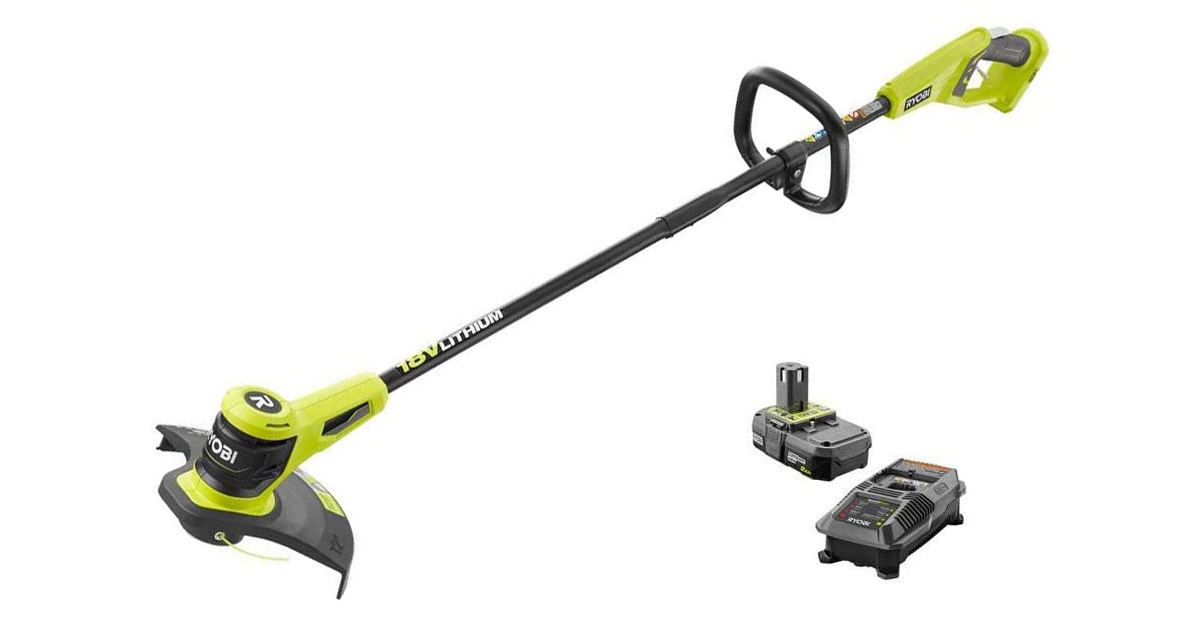
Ryobi is one of our favorite brands for yard tools. Their products are less expensive than many out there and often function as well as the professional brands for light to medium-duty jobs.
Of course, there is a downside to choosing these less expensive options. And that is that they often run into little glitches and problems. This is especially true, we’ve noticed, with the Ryobi 18v string trimmer.
Luckily, many of the common issues seen with this tool can be easily fixed with a few simple steps.
In our Ryobi 18v string trimmer troubleshooting guide, we’ll look at the most common problems with this tool and walk you through how to fix them.
1. Ryobi 18V Trimmer Won’t Start
If your Ryobi 18v weed wacker won’t start when you depress the switch trigger, the problem is most likely due to the batteries, a connection issue, or a mechanical problem. Luckily, most of these are easy to fix with a few short steps.
If you suspect a faulty battery, you can find genuine Ryobi 18v batteries at Amazon.
The shaft isn’t connected completely
If the shaft is not securely connected at all points, the power from the battery can’t reach the motor to turn it over.
- Uncouple the shaft connection.
- Clear away any debris.
- Recouple and twist into place until you hear the click.
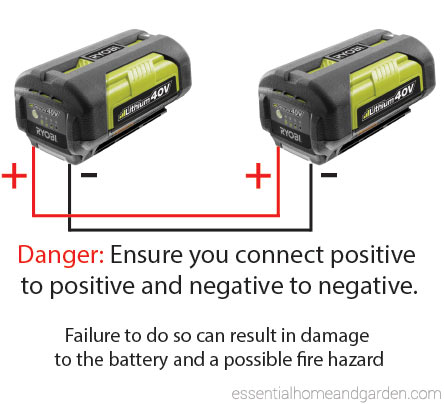
The battery pack isn’t secured
 Source: ryobitoolsusa on Instagram
PIN IT
Source: ryobitoolsusa on Instagram
PIN IT
If the battery pack isn’t connected completely, it won’t make good enough contact with the terminals to start the motor.
- Remove the battery.
- Clear away any debris on the battery and head terminals.
- Resecure the battery, pressing until you hear the click.
The battery isn’t charged
If the above solutions don’t work, your trimmer most likely won’t start because the battery does not have enough juice to turn over the motor.
- Remove the battery and place it on the charger.
- The charging indicator light should start blinking. If you get an error or the light does not come on, see #6 below.
- Wait until the battery is completely charged before trying again.
If these methods don’t work, you may have a faulty battery or a faulty charger. These can be purchased at the links below:
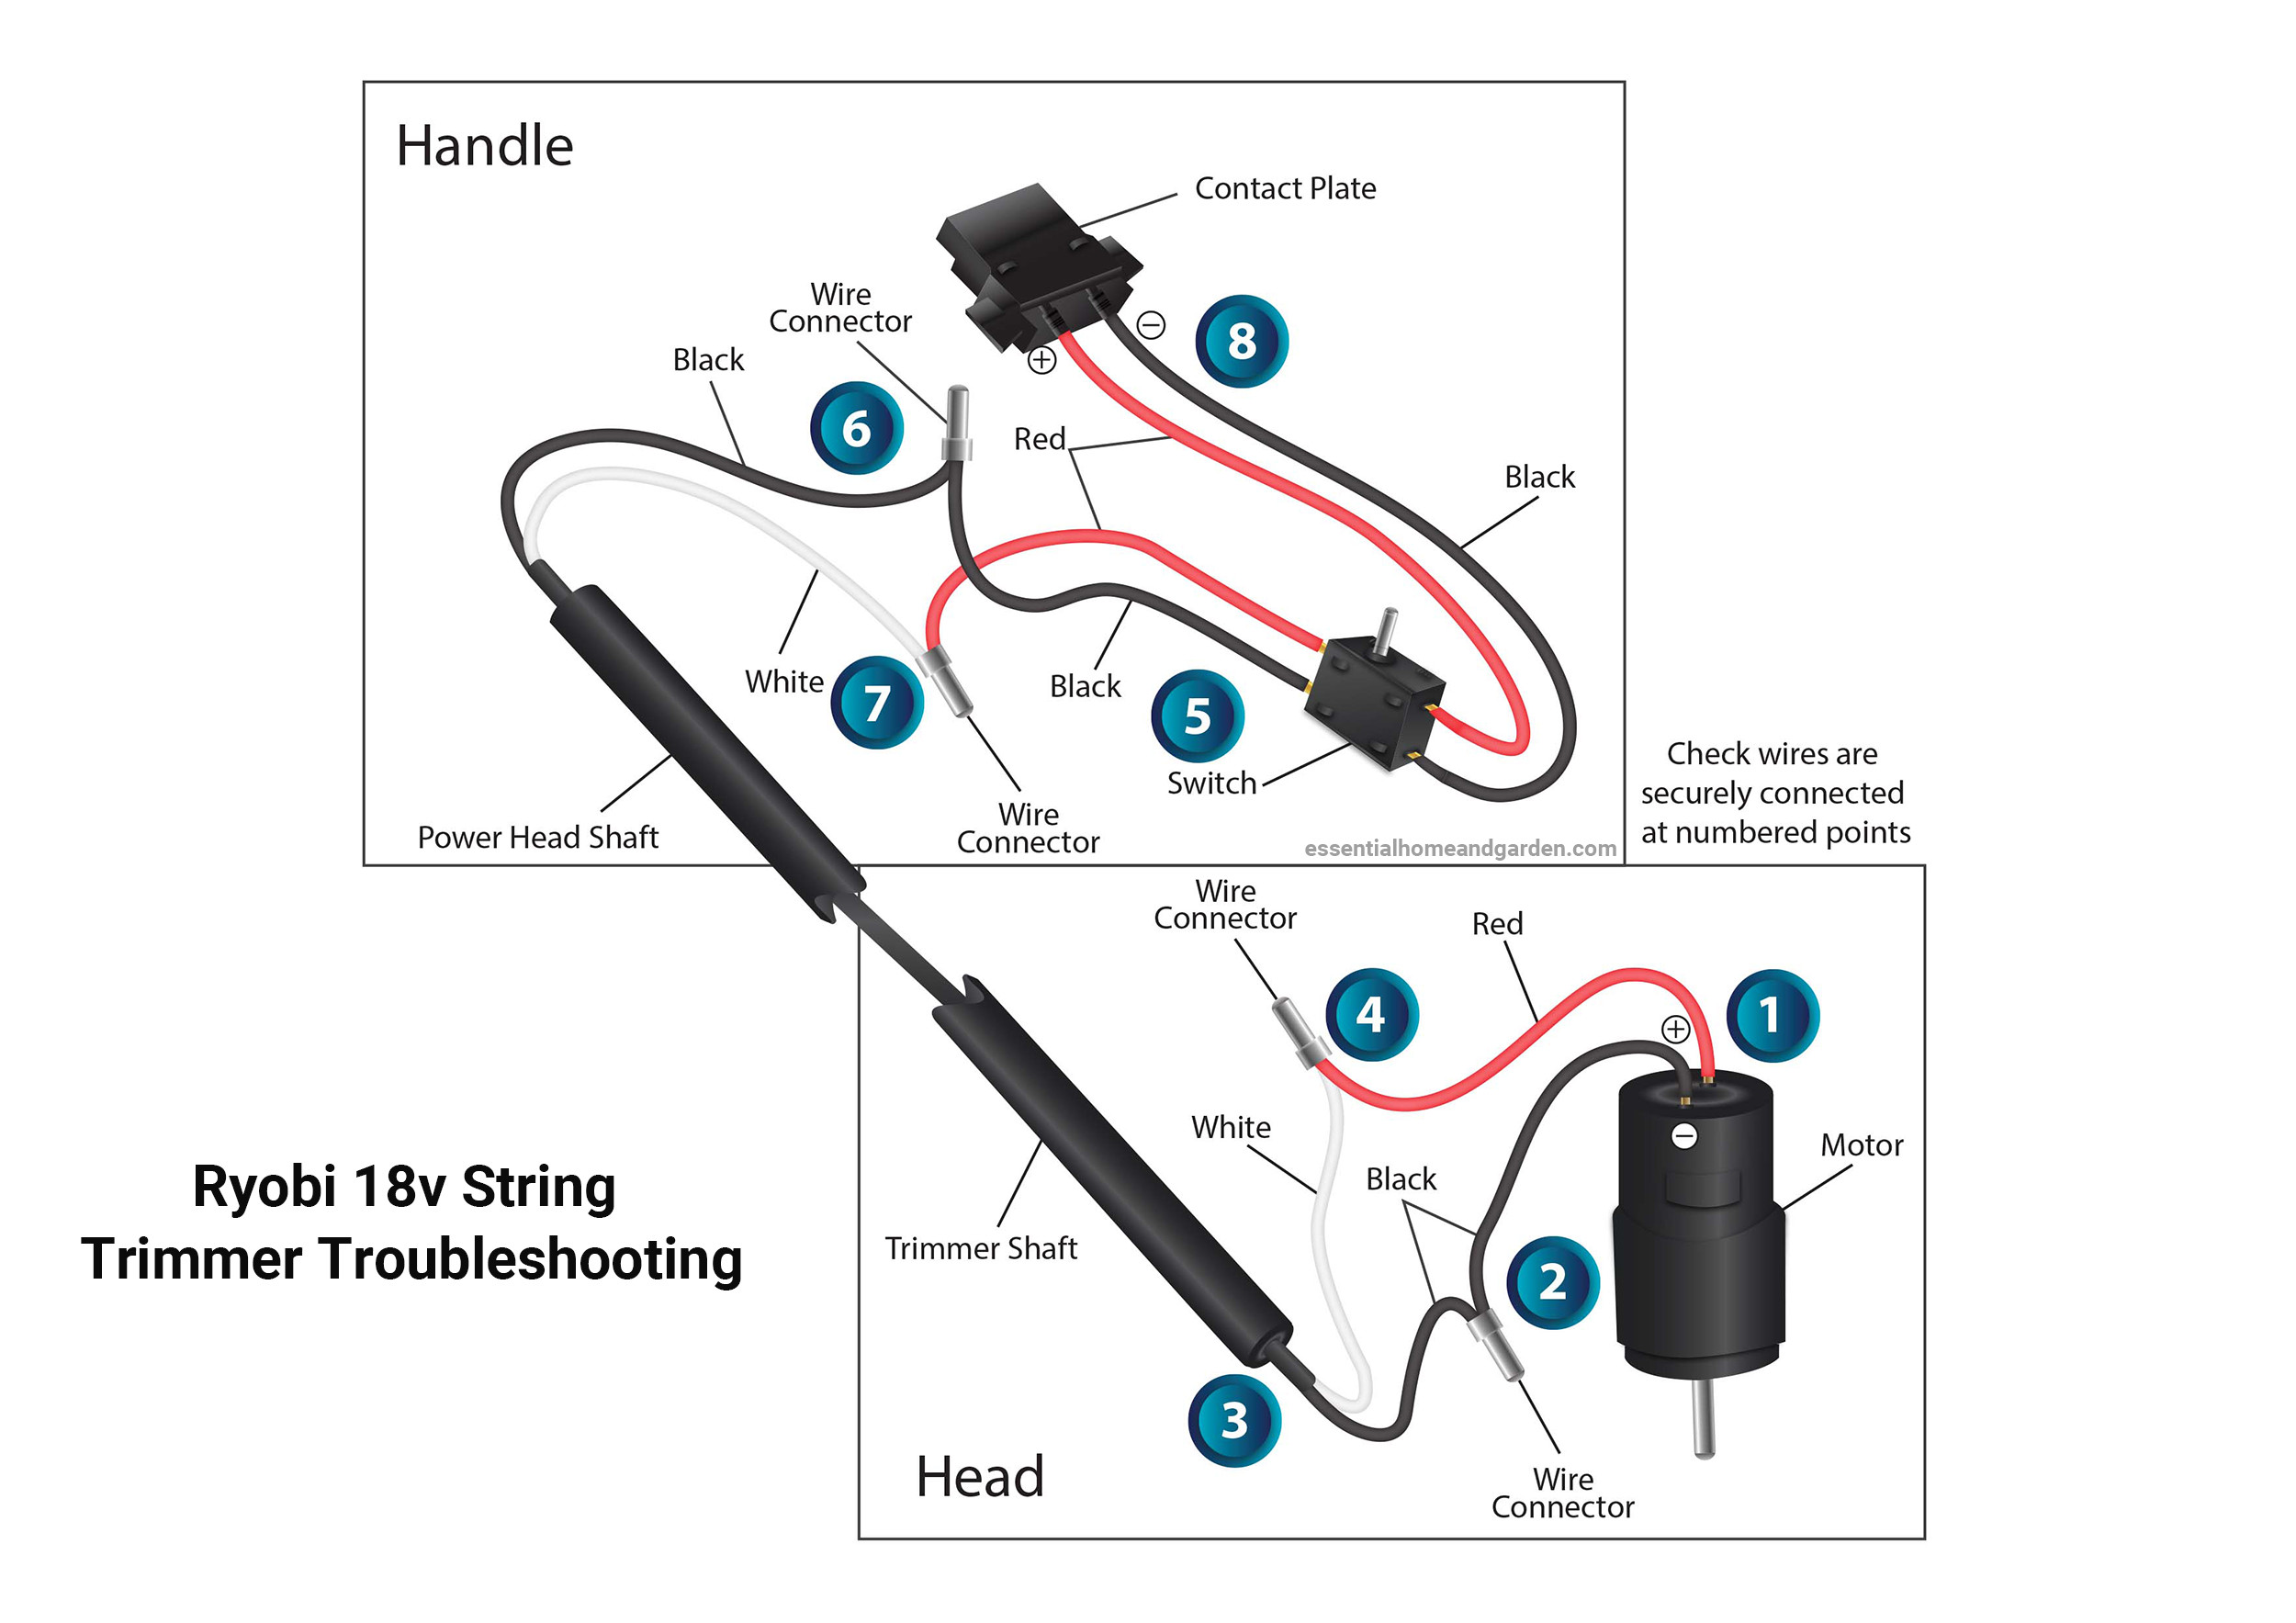
Broken connection
Multiple wires connect the battery terminal and switches in the handle to the motor in the head of the trimmer. If any of these connections break, the motor won’t engage.
The most likely wire to become disconnected is the white wire that connects the motor to the shaft. Luckily, this is an easy problem to check and fix.
- Remove the screws in the trimmer head to open it up.
- Carefully lift off one side and examine the wiring inside. The two black wires should be securely connected, as should the white wire from the shaft and the red wire from the motor, as shown in the diagram below.
- Ensure all connections are secure, then close the housing and test.
- If this doesn’t work, there may be a loose connection in the handle. Remove the screws in the handle to open it up.
- Assure all connection points (see picture below) and securely connected.
Note: If none of these solutions work, then it’s likely one of your components has burnt out or malfunctioned. Contact the manufacturer for a replacement if the unit is still under warranty.
2. Ryobi Cordless String Trimmer Stalls
Electric trimmers like this one stall for one reason: something is overheating, causing one of the temperature sensors to switch the unit off to avoid damage. Overheating is typically caused by vent blockage around the battery contact plate, around the motor, or a problem with the motor itself.
Dirty air vents
The 18v electric trimmer doesn’t have an air filter like the gas version. But it does have air vents around the motor and battery contact plate (on some models) that can become blocked with debris.
- Visually check for debris stuck in the vent holes around the contact plate (located just below where the battery attaches) and around the motor (above the spool housing, in most models). Manually remove what you can.
- Use a shop vacuum with a brush attachment to clear away fine debris from both vents.
Malfunctioning motor or contact plate
If cleaning the vents does not help, then there is likely a problem with the motor or contact plate. Your best bet here is to call the company, especially if the unit is still under warranty.
If it’s not under warranty, try these steps:
- Identify which end the problem is occurring in by feeling for obvious heat buildup after the unit stalls out. If the handle is hot, your problem is the battery contact or associated switch. If the head is hot, the motor is likely the issue.
- Open the handle or motor head (whichever is overheating) by removing the necessary screws.
- Examine the part for obvious damage or dysfunction. If everything looks normal, use a can of air to remove any debris that’s built up.
- Resecure the housing and test.
If this doesn’t work and the motor and battery contact appears to be in good working order, you may be able to create a workaround by installing an external fan to help keep the problem area cool.
There are many DIY options for this described on the web, including this simple hack that uses two 24-volt fans.
3. Runs Rough
A rough-running gas trimmer can be caused by a plethora of issues. Luckily, with an electric unit, the causes are far fewer. In fact, a rough-running Ryobi 18v trimmer that chugs, slows, and speeds up without input, is likely suffering the same issues as one that stalls completely.
If your trimmer is experiencing this problem, it’s important to act fast before the issue becomes worse and causes the tool to stall.
Start by cleaning the vents as described above. If that doesn’t work, open the motor compartment and handle and clean and inspect the motor and battery contact.
4. Ryobi Line Trimmer Head Won’t Spin

If the head of your trimmer suddenly stops spinning mid-use or doesn’t start spinning when the unit is turned on, you likely have one of two problems. Either the string is bound up in the spool and physically preventing the head from spinning, or the motor is not engaging with the trimmer head.
Bound-up spool
A bound-up spool can quickly overtax your trimmer and cause damage to the motor, so it’s important to turn the trimmer off immediately if the head stops spinning. From there, you can easily identify and solve the issue.
- With the trimmer powered off, remove the string head.
- Open the spool as you would to install a new string (see video below).
- The tangled string will be obvious. Unwind it manually and rewind the string cleanly, then reinstall the spool and try again.
If you don’t see any obvious tangles in the line, then the issue is likely a problem with the motor. You can buy a replacement motor online through various retailers using your tool’s model number.
Note: If you don’t see any obvious tangles in the line, then the issue is likely a problem with the motor. You can buy a replacement motor online through various retailers using your tool’s model number.
5. Ryobi 18V Trimmer String Line Won’t Feed
There are a number of reasons that your auto feed spool can fail or that you cannot advance the line manually. Luckily, the fix for each issue is generally pretty straightforward.
Note: Make sure the trimmer is powered off before attempting these fixes.
- The line is too short. If the string has been sheared off too short to engage the auto feed, use needle nose pliers to manually pull on the string while depressing the feed button.
- The line is tangled. If the line cannot be advanced manually, a tangle is likely. Remove the string housing and rewind the string cleanly.
- The string has welded to itself. If you cannot easily unwind the string to rewind it (and it is not obviously tangled), try lubricating it with some silicone spray, replacing the spool, and then advancing it manually.
- The string has run low. If there isn’t enough string left on the spool to advance, replace it with a fresh spool.
If troubleshooting issues with the string does not solve the problem, there may be something wrong with the string housing itself. You can contact customer service for a replacement part or order an aftermarket replacement yourself.
6. Ryobi Cordless Weed Wacker Battery Won’t Charge
By far, one of the most common problems with Ryobi products is with the batteries not charging. If you get the blinking lights of death when you place your batteries on the charger, one of four common issues is likely to be the problem.
Batteries are too hot or cold
If you’ve just pulled your batteries off the trimmer after a long job, it’s possible they won’t charge because they’re too hot. Try placing them in the fridge for about ten minutes and then trying them on the charger again.
If the batteries have been in storage in the garage or shed, then it’s possible they’ve gotten too cold to charge. Bring them inside and let them warm up to normal room temperature before trying to charge them again.
Corroded or dirty terminals
If the terminals on your battery or charging dock are dirty, the battery won’t charge. This type of charging failure usually does not elicit the blinking lights of death because the charger won’t register that the battery has been loaded.
For corroded terminals, use a piece of fine sandpaper to remove the corrosion.
If dirt or debris is the problem, use a wire brush and alcohol wipes to get them clean. Then try loading the battery again.
Faulty charger
It’s possible the problem is not your battery but the charger.
To test this theory, bring one of your batteries to the closest home improvement store and test it on one of their battery chargers. If it works, you might as well buy a new charger while you’re there because yours has likely failed.
New chargers are available here.
The battery is in sleep mode
This is by far the most common cause of battery failure in Ryobi batteries (but also the most time-consuming to troubleshoot, which is why we saved it for last).
When batteries are stored dead, it’s possible for the power to drop so low that the charger can’t detect whether the battery is healthy or not. To avoid damage, the charger won’t connect to these batteries to charge them. Most chargers have a boost feature that overcomes this, but not Ryobi chargers.
If your battery has entered sleep mode, you’ll need to get it back to the minimum power level before you can charge it regularly. The easiest way to do this is with micro charges.
- Place the battery on the charger, then count how long it takes for the lights to start flashing.
- Remove the battery.
- Place the battery back on the charger and start counting, removing it one second before the lights would have started flashing.
- Repeat this step multiple times until the charger flashes green and begins charging the battery normally.
If this doesn’t work to wake your battery up, there are other options for boosting a sleeping battery. You can check our guide on how to fix common Ryobi 40v battery problems.
7. Engine Emits Smoke
There are many stories of Ryobi trimmers smoking, both from the motor and the handle. When this happens to an older model, it is typically a sign of wear and subsequent motor failure. In newer units, it is likely a matter of a manufacturer defect.
Since a smoking trimmer has the potential to catch fire, you should immediately turn the trimmer off and remove the battery if you see or smell smoke. Leave the trimmer to cool on the sidewalk or driveway, away from flammable debris.
For new trimmers, contact the store you purchased it from or the manufacturer right away. It should be covered under the manufacturer’s warranty, and they will replace it. For older models, you can try replacing the motor but proceed with caution.
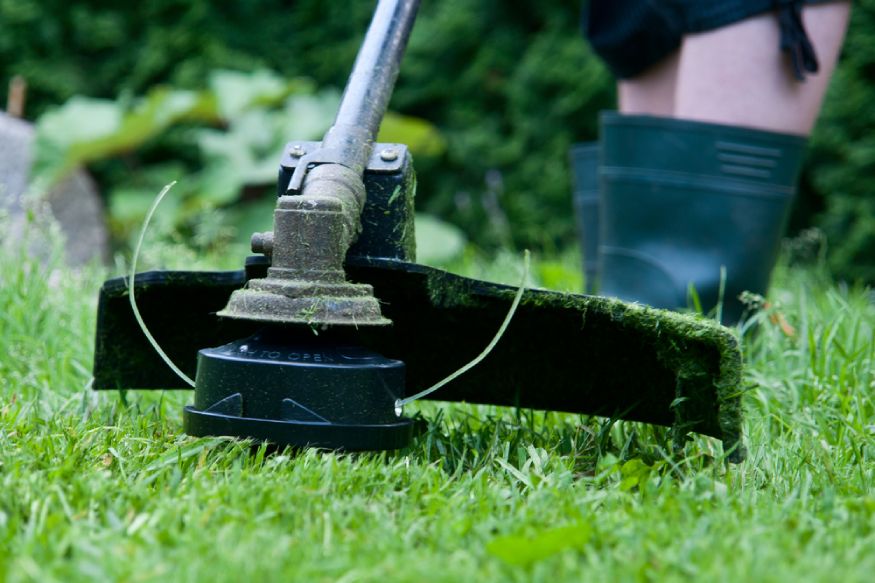
8. Grass Wraps Around String Head
Tall grass can easily become wrapped around the boom housing and string head, causing it to stall. This is especially likely to happen when you’re trimming long, wet grass. Luckily, there are a few tips you can follow to reduce how often this happens:
- Always trim tall grass from the top down. Move the trimmer back and forth over the grass, taking a few inches off with each pass until you get to the ground rather than starting at ground level.
- Use higher speeds when trimming tall grass. This will help assure the grass blades are cut and thrown away instead and being bent and pulled into the housing.
- Wait until the grass dries. Dry grass is much less likely to bend and get sucked into string housing than wet grass.
If you’re still struggling to get your Ryobi 18v string trimmer to run well after completing this troubleshooting guide, then it may be time to purchase a new trimmer. Our battery powered string trimmer reviews can help!
i have a ryobi ry15527. The string line holder popped off when i started it up and now it won’t go back on. How do I fix it. When I try to attach it, the jutted out parts will not go down into the slots because 3 of them are blocked.
I just purchased a Weed / Edge trimmer, and the automatic string feeder / release is constantly binding up and I have to pull the cap off and manually start the feeder again.
This has happened at least 10 times on the very first use. It is the string that came with the trimmer. If this isn’t solvable I’m ready to return the trimmer as defective. It takes much longer to use this trimmer as it is than to cut the weeds by hand. I am very unimpressed. This is not my first Ryobi product.
I don’t know if my particular fault is covered in this article, the descriptions don’t seem to fit. When I push the trigger the motor engages for a second and the spool clicks round a fraction of a turn then stops. Push the trigger again, same thing. This is with multiple batteries which all work in my other Ryobi tools. Any ideas or point me at the fix above and I’ll give it a go!
Robert, did you find out what is causing this? I am having the same issue. It runs for a second then quits, batteries seem to be fine.
I’ve got a P2008 purchased about 5 yrs ago. A few things it does(starting in yr 2 and gradually getting worse):
1. Line auto feed works when it wants to. It will feed out when I let go of the trigger, but it will not re-engage to lock the line(so it puts out much more than needed).
2. Speed randomly changes. I’ve got the selector switch on “High” and it will start out very slow but will build up speed, sometimes while not re-engaging the lock on the line. It also goes absolutely bonkers fast, occasionally until I let off the trigger but most often it dies.
3. Short run time. Often it will run only for a few seconds. As it does this, see problem #1. I literally have to carry a pair of pliers/cutters in my pocket to trim off the excess line. Last attempted use of this trimmer it was running fine, then stopped and started for a few seconds. This happened about 8 times in a row, so I had to stop.
4. Occasional constant run. During use, when I need to feed out more line I’ll release the trigger but the trimmer continues to run. Mostly at very low speed, but sometimes at full speed. Also it actually started running as soon as the battery was installed, even though the trigger was not touched.
All these started after I had the unit about 2 years. It has gotten gradually worse each season. Without much problems, I can trim/edge the sidewalks(corner lot), front walk, driveway, fence line, flower beds, drainage ditch, and curb edge on a single charge, so the battery is about the only thing I’m NOT having trouble with. That said, I’m not sure the thing has run without any of these mentioned problems since I first got it out of the box.
Brand new Ryobi trimmer/edger. I want it mainly for edging. I use it for just a few feet and the string breaks off. What am I doing wrong?
I have aligned the arrows but can’t get the string through the head to replace it. I have straightened the string as much as I can but it won’t go through. The string that came with it was tangled so I removed it but can’t get the new one on.
My 18 volt Ryobi trimmer runs for a few seconds and then cuts off. My guard became unattached. Did this have anything to do with the problem?
18V 13″ whisper weed eater runs for a bit (drains one small battery) then quits. removing and replacing battery will see the system run for 10 seconds then stop. (remove and replace battery will repeat run and stop) removed cover and flushed out debris. can not find hot spot when running with cover off.
I had to remove the spool and now I can’t get it back on. Ideas?
I actually took the blade off and sharpened it but it still will not cut the excess string.
Battery-operated weed eater worked for a few seconds, would stop, then start after just waiting for a few seconds. I had taken the guard off the spool area and the string was extra long. I Changed the batteries and no difference even though I was not cutting or putting the unit under a load. Finally, cut the string shorter and the weed eater worked as it should. I am not sure how the weed eater detected the longer string and did it in a few seconds.
My Ryobi 18 volt weed whacker string does not cut at the cut off piece and the string wraps around the string housing unit
Hi Paul, is the cutter clear and clean? Check that first.