Are you looking for a cheap but effective way to refinish your outdated bathroom or kitchen countertops? Or maybe you have stained or worn laminate that you would love to cover up instead of replacing.
Epoxy resin is a great option for restoring old, dated kitchen and bathroom countertops and even some types of flooring.
But doing your own DIY epoxy job can be difficult and time-consuming.
In this article, we will take an in-depth look at epoxy resin countertops, the advantages and disadvantages of them, as well as what it takes to DIY your own. We’ll also show you some great examples of different epoxy countertop projects so you can start planning for your own home.
Disclosure:It is important you understand that we may receive commissions when you click our links and make purchases. However, this does not impact our reviews and comparisons. All opinions are our own we pride ourselves on keeping our articles fair and balanced. For more info see our disclosure statement.
What Is an Epoxy Resin Countertop
![mixing epoxy liquid together]](https://www.essentialhomeandgarden.com/wp-content/uploads/2020/11/epoxy-glue.jpg)
Unlike laminate, granite, or Corian, epoxy countertops are not something you can buy off the rack from a home improvement store.
Epoxy resin is actually a liquid–well two liquids, really–that must be poured in place on top of an existing countertop. This can be done as a DIY project or completed by a professional. But the entire process of creating and finishing the epoxy countertops will be done in your home.
Epoxy is made by mixing a liquid resin with a liquid hardener.
These two materials begin a chemical reaction when mixed together. The product of this chemical reaction is a rock-hard substance that can stand up to heat, scratches, and other types of damage.
These features make epoxy the perfect candidate for use on countertops.
Colors and Patterns
Another great feature of this substance is that it comes in a wide variety of colors and tints.
By mixing plain resin and hardener, you will get a clear, glossy finish. This type of epoxy is perfect for sealing or restoring wood countertops and cement. Or for use over patterned contact paper, painted counters, or other surfaces you want to be seen.
You can also add white or colored pigments to create opaque epoxy to hide blemished and worn countertops.
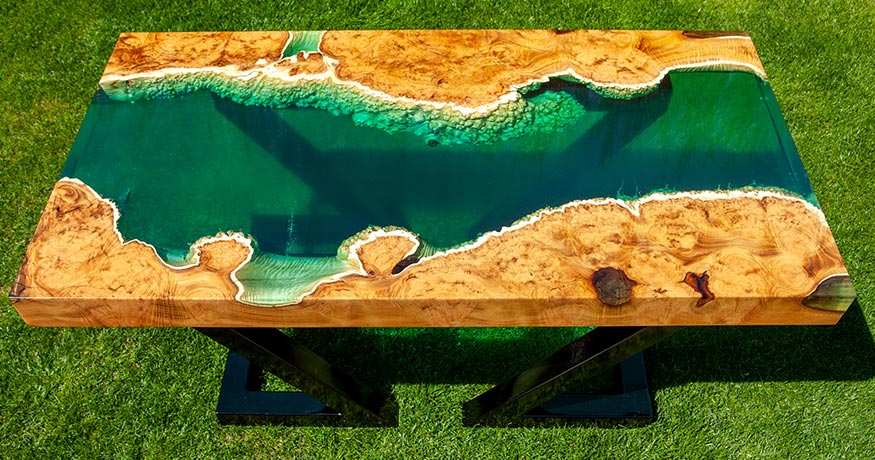
Pouring one color of epoxy in a pattern on top of a different colored base will give you a unique piece of art. You can even use this method to recreate the look of granite or marble.
Because resins come in hundreds of colors, and different finishing techniques allow for different sheens and textures, there is no limit to what epoxy countertops can look like.
The Advantages of an Epoxy Resin Countertop
Epoxy resin countertops are becoming more and more popular. And that’s largely because of all the advantages this type of counter has to offer.
Durable and Long Lasting
Epoxy resin is durable.
Once cured, it has a strength of over 10,000 psi, meaning it can withstand 10,000 pounds of pressure concentrated on a single square inch.
So don’t worry about dropping your cast iron frying pan or favorite soup pot on this surface. It will be just fine.
That extra hard finish also means epoxy won’t scratch or chip easily. And that ultra-glossy finish will stay brilliant for years.
Seamless
One of the biggest downfalls of laminate and even expensive granite and marble is that, with a big enough counter, you will get seam lines.
Not only do these seams disrupt the pattern of the counter, but they provide an annoying crack for food and debris to hide in.
Because epoxy goes on as a liquid, there are no seam lines. So no matter how huge your counter, you end up with a single continuous piece from one end to the other.
High-Gloss Finish
You know that beautiful, high-gloss finish of a true marble countertop? You can emulate it perfectly with epoxy resin.
Once cured, epoxy shines like nothing else. Not only is this finish gorgeous, but it is super easy to keep clean. There is no texture for food particles or liquids to get caught in.
Of course, if you want to take a different approach and create a matte or textured counter, you absolutely can with this versatile product.
Infinite Design Options
The simplest way to use epoxy resin is as a clear, gloss finish. In fact, nothing beats the look you can get from an epoxy resin for wood countertops. But that is not by any means the only way to use it.
Color resins provide an opaque finish to match any kitchen aesthetic. You can even mix colors together during the application process to create art or imitate natural finishes.
Adding glitter or metallic resin adds yet another design option.
All of these options mean epoxy resin provides the widest array of design choices of all counter material types.
Heat Resistant
In addition to being resistant to cracks and scratches, epoxy resin countertops are also resistant to heat.
Spilling boiling water or hot food on them won’t damage the finish. Even setting a hot pan down on these counters isn’t likely to cause a problem.
Still, it is best to avoid any prolonged contact with hot objects. Don’t make a habit of leaving hot pans on the epoxy for long periods and make sure you clean up any hot spills as soon as they happen.
Non-Toxic
Because creating epoxy requires a heat-driven chemical reaction, the materials do put off a lot of VOCs during the installation process.
But, once the resin has cured, it is completely non-toxic and food-safe.
That means you don’t have to worry about any chemicals leaching into your food from the finish or any toxic glue finding its way onto your plate. In fact, you could prepare your meal directly on the countertop surface and not have to worry about toxins or scratching the counter.
Easy to Care For
Lastly, epoxy resin countertops are incredibly easy to care for.
You can use any type of cleaner on them without worrying about doing damage to the finish. But, because epoxy has such a hard, non-porous surface, deep cleaning is rarely required. Typically, using a food-safe surface cleaner and rag will suffice.
Plus, the glossy sheen you get after the liquid hardens will stay that brilliant for years. And once it does start to dull, you can bring it back to life by applying a simple coat of mineral oil.
The Disadvantages of an Epoxy Resin Countertop

There is a lot to love about epoxy counters. But there are some downfalls to this cheap yet durable product–most having to do with the installation process.
Not Stain-Proof
While heavy pains and sharp knives won’t phase a well-cured epoxy counter, dark liquids definitely can.
Luckily, as long as the spill is addressed quickly, there shouldn’t be any evidence left behind. Sauces, red wine, and other deeply colored liquids that are left on the counter long enough to soak through the hard surface, however, could leave their mark indefinitely.
Challenging to Get Perfect
Getting a beautiful, brag-worthy epoxy counter takes some skill.
- First, you have to measure the resin and hardener accurately in order to produce a rock-hard finished product. Too much of one or the other can lead to a finish that is tacky to the touch.
- If you are using color, you’ll want to experiment with how much pigment to add to get the exact shade you want. And then you’ll need to replicate that amount exactly for each coat.
- Lastly, you’ll need to apply the liquid in thin, even coats. Go too thick and the chemical reaction will leave you with bubbles and an uneven surface. Go too thin and you’ll be at it for weeks.
None of this is to say that doing your own epoxy countertop is impossible, but you should educate yourself on the process. If you want to go this route, take a look at this DIY epoxy countertops tutorial, first.
Messy Application Process
Even if you do get everything right, you will still make a mess.
Getting all surfaces level and fully coating the edges of your counters means that epoxy will get everywhere.
Make sure to take the time to put plastic down and move all portable appliances out of the room before you begin. You’ll also want gloves and protective clothing for yourself.
Very Difficult to Remove
The rock-hard nature of epoxy is an awesome feature… until you get it somewhere you don’t want it.
Once hardened, epoxy resin is nearly impossible to remove. This is true whether it is on your carpet or your cabinets. Again, this is why covering surfaces with plastic and covering your skin is so important.
This also means that if you let your epoxy counters harden and then change your mind, the only way you are getting rid of them is by ripping out the counters themselves.
The Process for Making Epoxy Resin Countertops
DIY epoxy countertops are a fun and beautiful way to revive your outdated kitchen or bathroom. But they can be a challenge.
If you are interested in doing the job yourself, the steps below will give you an idea of the process. If you aren’t so sure of your skill and would rather guarantee an attractive outcome, hiring a professional may be the better way to go.
Clean and Prep Your Surface
Remove all dust and debris from your countertops. Any particles left could cause bumps in your final product. And, even worse, if you are using a clear epoxy, debris left behind will be visible forever.
The last thing you want is that drip of tomato sauce to be eternally entombed in your otherwise pristine new counters.
So take your time and really scrub the tops, sides, and undersides of every surface the epoxy will touch.
You will also need to protect every surface not receiving epoxy with plastic sheeting. This includes your sink, any appliances in the way, and the floor. You can use painter’s tape to mask off areas, as well.
Pro tip: To prep laminate countertops, you’ll need to sand the surface to remove the top sheen layer. This will assure the epoxy adheres to the surface correctly.
Choose Your Design
If your old countertops are fine to look at but are in need of a facelift, a clear epoxy finish is a great choice. This is doubly true for wood surfaces that you want to make more durable.
But if your counters are damaged, stained, or are covered in laminate, you’ll need to choose a color pigment to add to your mix.
You can use a single, solid color, or get creative by mixing in stripes or splotches of other colors.
Whatever you choose to do, make sure you are prepared with all the materials, measurements, and have practiced the techniques beforehand.
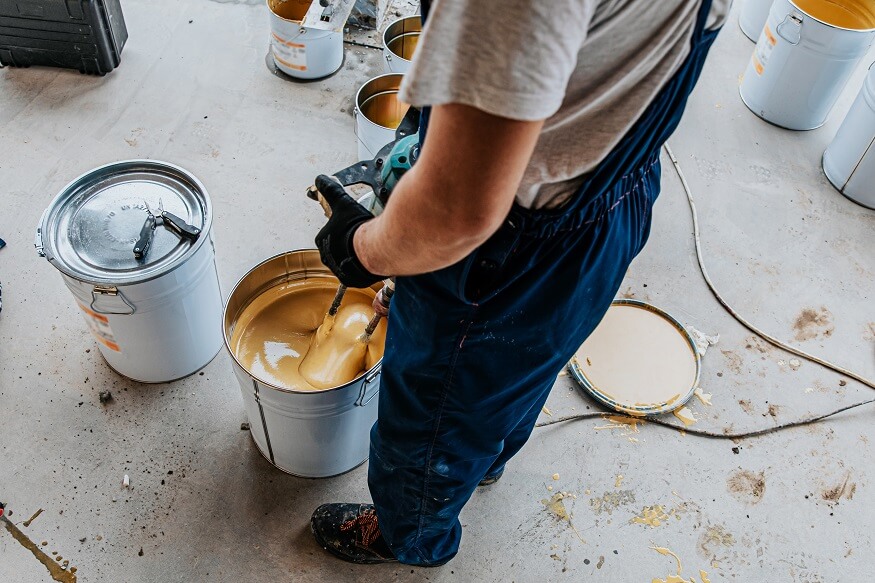
Mix Your Epoxy
The resin and hardener need to be mixed at the right ratio in order for the final product to cure correctly.
This ratio differs based on the brand of product you are using, so be sure to reference the bottle labels. To avoid any problems, always get your resin and epoxy from the same company.
If you are using color pigment, measure out the powder or liquid very carefully so you can use it in the same ratio for each mix you create. Otherwise, you may end up with one pour being darker than the next.
If you are using more than one color, mix each in their own container and be sure you have enough of each to complete the first coat.
Pro Tip: Epoxy takes about 20 minutes to begin hardening, which means you will need to create your mixes right before you begin the pouring process.
Pour Your First Layer
Pour your mix (or base mix if you are using multiple colors) over your counter in a uniform pattern. Then smooth it out using a trowel or paint roller.
Make sure to cover the edges as needed. You can catch any runoff with your epoxy container and re-pour it on other areas of the counter.
If you are adding additional colors, now would be the time to do that.
Your goal with this first layer is to go as thin as possible to create a solid seal between the epoxy and the counter surface.
Allow Time to Cure
As soon as you have covered the entire surface and gotten it evenly spread, use a heat gun or blow dryer to target any bubbles.
By gently moving heat over the surface of the wet epoxy, you can coax the bubbles to the surface where they will disappear.
The epoxy will begin to harden within 20 to 30 minutes. Any bubbles that remain in the liquid at this point will be trapped, so make sure you work quickly and diligently.
Your surface should be fully hardened after 48 hours.
Apply the Next Layer
Double-check the instructions on your specific product, but you should be good to add your next layer after 48 hours.
The first layer should feel hard to the touch. If it is still tacky, you’ll want to wait a little longer.
Use the same technique to pour your second layer, but feel free to make this one a touch thicker now that a level surface has been established. Ideally, you’ll want about an eighth of an inch of epoxy total. You can typically accomplish this with just two coats.
Note: For some multi-color techniques, you will apply a clear coat as your final layer.
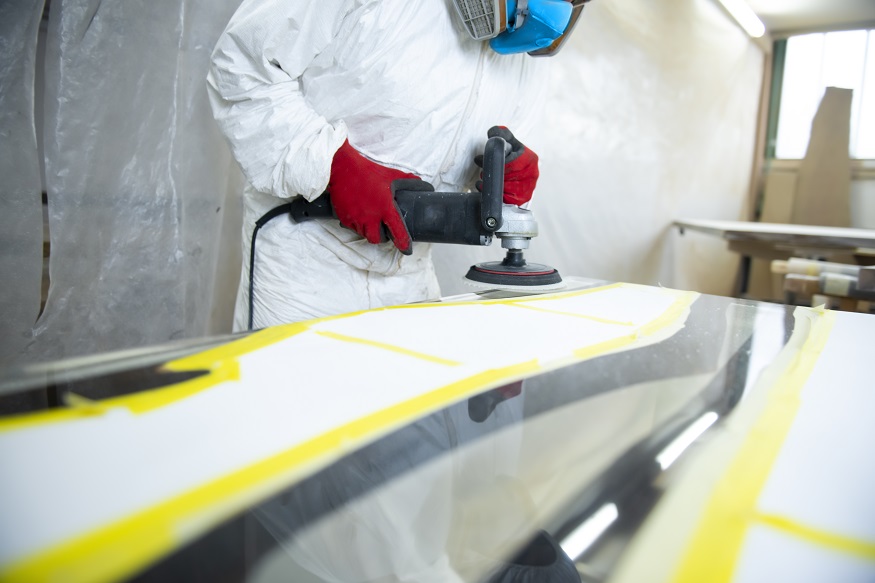
Finish with Polyurethane
You can begin removing the tape and plastic from your space as soon as the final layer begins to set.
After another 48 hours, your epoxy should be fully cured.
Adding 4 to 5 coats of polyurethane on top of it will help protect the shine and add to the durability of your new counter.
Allow at least 12 hours for the poly to dry before using the surface.
Epoxy Countertop Ideas

The number of ways to use epoxy to refinish your counters is truly endless.
To help you navigate through all the possibilities, we have compiled a number of beautiful finished project ideas to give you some inspiration.
Clear Epoxy
With clear epoxy, you can use just about anything as the base for your countertop design.
The crafty DIYers from Farmhouseish used chalk paper and painted it to look like granite. Then used clear epoxy to give it the right sheen and durability to rival that expensive rock.
Clear epoxy can also be used to immortalize objects, like this bar top filled with beer caps.
A more classic take on this technique is to put clear epoxy over wood or butcher block to preserve and enhance the beauty of the wood, like this beautiful kitchen island.
Pigmented Epoxy
If you really want to add some serious pizzazz to your counters, color pigments are the way to go.
One simple method for utilizing colored epoxy for a countertop is to add metallic powder to a uniform base. This beautiful galaxy-style counter uses black color pigment and three different metallic powders.
You can also use secondary colored epoxies to emulate the look of natural stone, like this simple marble finish or this very flashy granite finish.
When you add multiple colors to the mix, there are no rules to how carried away you can get.
This modern counter features a white base with black, grey, and rust accents. It has an eye-catching and beautiful look that even the novice epoxy DIYer could accomplish with a little practice.
This more advanced design has an awesome marine vibe and brings a lot of bright colors to the room.
Finally, we leave you with this beach-style bar top, just to prove there is nothing you can’t do with epoxy.
Epoxy Resin Countertop Cost

Have we inspired you yet?
Before you run to the store to start buying supplies or call your local epoxy experts, it is a good idea to understand how much it will cost to install epoxy countertops.
DIY Epoxy Countertops
Doing your own epoxy job will certainly save you some money.
In general, supplies will cost you around $5 per square foot. Lower-quality hardeners and resin will be closer to $3 per square foot, but will not be as durable or easy to work with. Higher-quality products, on the other hand, will cost about $8 per square foot.
Even for the highest-quality mixes, you will spend less than you would with granite or marble but will be getting a similarly durable and beautiful product.
In addition to the materials for the epoxy, you will also need to consider the expense associated with prepping your counter surface and protecting your cabinets and floor.
By far, the most costly part of doing your counters yourself comes with the time commitment.
Expert Installed Epoxy Countertops
Getting an expert to do your countertop refinish for you is a great way to save on time, but you can expect to pay a lot more for the overall project.
Most contractors who offer epoxy work charge around $50 per hour, with some charging a little less, and some much more.
When you consider the additional cost of materials, this comes out to about $100 per square foot, according to Caesarstone.
Of course, if you are dreaming of an elaborate epoxy design, a skilled contractor will be more than worth the extra money.
How to Care for Your Epoxy Countertop
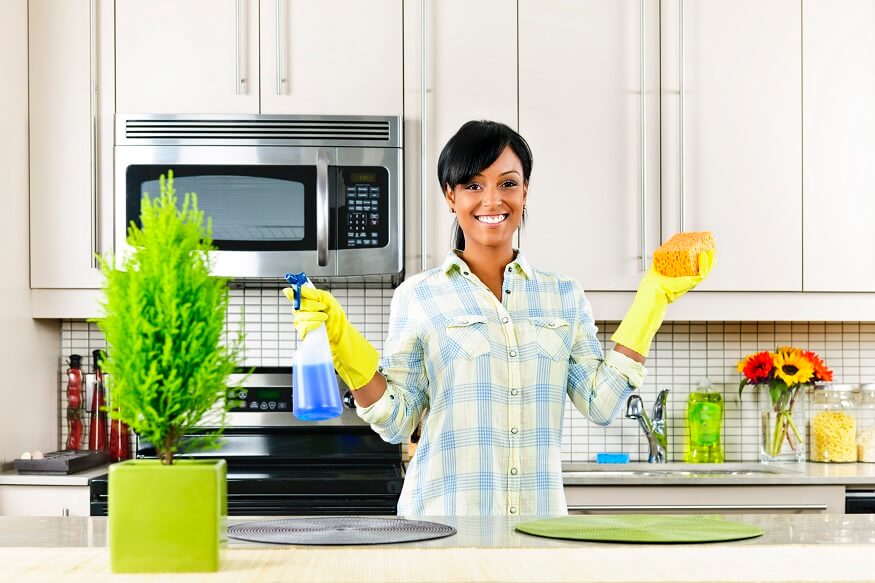
Epoxy resin countertops are fairly easy to care for but do require some maintenance.
Daily Maintenance
As we mentioned, any household surface cleaner will work on your epoxy counter. Just be sure to avoid abrasive cleaners and powders.
If you have a high-gloss finish, you’ll probably want to find a good streak-free cleaner to keep on hand. If your countertops are in your kitchen, make sure to use non-toxic cleaners only.
Dealing with Scratches and Stains
While it is unlikely that you will scratch your epoxy, it isn’t completely unheard of. Luckily, it is fairly simple to buff out scratches on this kind of surface.
To do this, apply polishing paste to the affected area and use a buffing pad on a drill. Move in a circular motion over the scratch. Start with a coarser pad and move to a finer grade until the finish matches the rest of your counter.
Stains are something you are much more likely to have to deal with on an epoxy surface.
The simplest way to remove stains is by combining water and baking soda to create a paste. Apply this to the stained area and wait at least five minutes.
Use a cloth to wipe off the paste.
More stubborn stains may require treatment with acetone.
Apply a little acetone or paint thinner to a cloth and gently rub the stain in a circular motion. Continue adding pressure until the stain comes out.
Long Term Care
Rubbing your counters down with mineral oil every few months will help them keep their brilliant sheen. Beyond this, they shouldn’t require much time or effort to maintain.
The Wrap Up
Epoxy resin countertops are a beautiful way to transform your kitchen and bath.
They are durable, heat and scratch-resistant, and come in a huge variety of designs and colors. But they can be messy to install and difficult to do yourself.
If a DIY job sounds like too much to take on, having a professional do your install is another great option.
If you have any questions about epoxy countertops or want to share pictures of your own work, please leave a comment below!